Tuesday, November 1, 2022

The great zine give-away

Project ended successfully. 36 zines being packaged to mail to 36 people in 7 countries. Last edit: Nov. 30, 11:10 AM.


If you listen to my podcast, you'll know that November 2022 episodes are devoted to zines. I'm going to go through a bunch of the ones I've collected and give most of them away. The zines I'm parting with are listed below. If you are interested in receive one by mail (no matter where you are):

  • Send the following by email 
  • The subject line MUST contain = Zinevember
  • Contents must include your full mailing address
  • You may list of up to three choices, ranked from 1 (most desired) to 3 if you want. You will get a random zine, but I will honor preferences when/where I can. 
  • You may also let me know if there are any give-away titles you already have (and don't want a second copy of).
  • All emails must be sent by November 25th. You may want to wait to send your email as the list will grow and early emails will not be prioritized over later ones - I'm going to randomize the order I process them. If for some reason you want to "overwrite" an earlier email with a new one, number your email in the subject line like "Zinevember 2," and I will honor only the highest numbered email you send me.

Donated Zines!

1. Face Folio, Goblin's Henchman, 20. [Featured in episode 339.]

My Own Zine-Overflow Give-Aways!

Nov. 1: Strange World, Aaron M. Sturgill, 2021. A complete ttrpg for 1-5 players and a GM. "In the far future, humanity has expanded throughout the galaxy, but has thus far found only remnants of ancient aliens civilizations. Today, your scout ship picked up an unusual communications signal [...]"

2: Forking Paths 2, Nathan Harrison, 2019. A cool essay about the myth of the labyrinth and a tile-placement labyrinthine story game for solo or group play. Includes a separate business-card sized game called The Caravan. [Featured in episode 319.]

3: Mouth Brood, Amanda Lee Franck, 2021. "A system-agnostic adventure in an ecological pressure cooker." Copius illustrations, essentially a monster book and a hex crawl, set in a biosphere that has been sealed away in a glacier for millennia.

4: Thousand Pound Canvas, Mark Conway, 2020. Troika. 36 (new) backgrounds and more.  [Featured in episode 317.]

5: Delver 1, James Floyd Kelly, 2021. OSR/OSE. Lots of cool random tables for NPCs, items, etc. and a small dungeon - an abandoned monastery that fell to a plague. 

6: Fresh From the Forge, L. L. Blumire, 2021. OSE. "A rebalanced weapon system for Old School Essentials." Divides weapons into simple categories for more strategic play: width of striking area, damage against objects (doors) vs. opponents, etc. [Featured in episode 345.]

7: Lowlife, Sam Sorenson, 2021. Realistic cave crawling stuff! [Featured in episode 319.]

8: Courier, Cody Barr, 2021. Original system. A solo rpg about trekking goods across the wasteland. 

9: Dethroners, Jedediah Berry and Andrew McAlpine, 2021. Original system. A complete story game in which you "battle a divine tyrant for the right to tell the tale." [Featured in episode 316.]

10. Eat the Rich, Ambika Kirkland, 2021. Near-future, system-agnostic scenario in the spirit of High-Rise and Snow Piercer. 

11. Not a Place of Honor, David Lombardo and Emanuel Melo, 2021?. A guide for creating a site where horrible, broken, bad-wrong magic is buried and should be left alone. [Featured in episode 307.]

12. Harrowings: From the Rhine (issue 1), Various, 2019. A collection of ice-age fantasy material suitable for most fantasy RPGs, but occasionally tuned to a version of D&D. Digital is free

13. Aetherjack's Almanac 1-6, Ian Woolley, 2020. Troika. Space-faring stuff. [Featured in episode 317.]

14. The Cerulean Curtain, Mark Conway, 2021. Troika. A gladiatorial-theatrical sphere, complete with backgrounds. [Featured in episode 317.]

15. The Subterranean Malstrom, Alex T., 2022? System agnostic but kind of aimed at OSE. "Endless vile tunnel encounters for solo play and DMs." 

16. Wizard Funk 3, Robin Irwin et al, 2021. A miscellany of cool old school material and INTERVIEWS with important creators in the early days of the adventure game hobby.

17. Dodeca, Peter Lattimore, 2022. A d12 based old school feeling rules set for "adventuring through grimdark worlds."

18. The Drain, Ian Yusem, 2022? A full color, "funnel" for the Mothership SF RPG.

19. Harrowings: The Exalted Hours, Various, 2020. Miscellaneous material for supporting games themed around the twilight and the coming dark. Old school vibes. 

20. The Desert Moon of Karth, Joel Hines, 2021. [Discussed on Between Two Cairns.] Small moon sandbox for Mothership with a space-western feel.

21. Low Country Crawl, John Gregory, 2019. Southern Gothic (US) OSR goodness.

22. Mudwarren Alley, Jennifer "Moonpoison" & Evelyn Moreau, 2018. Collaborative OSR, copiously-illustrated dungeon. Fun, weird, and evocative.

23. Mothership (signed), Sean McCoy, 2018. Bought by me at Gen Con 2018 and signed by Sean on site. Popular horror-survival-SF RPG. This is the original zine edition.

24. Dead Planet, Fiona Maeve Geist, Donn Stroud, Sean McCoy, 2018. "A violent incursion into the land of the living for the MOTHERSHIP Sci-Fi Horror Roleplaying Game."

25. Cosmic Crawl, Evelyn Moreau, 2018. Lovecraftian astral goodness with EM's awesome illustrations.

26. Lighthouse at the End of the Universe, Ella Lim, 2021? Contemplative solo RPG about ... (the titel).

27. The Eternal Caverns of Urk (mini), Nate Treme, 2019. "A procedural science fantasy underground" with it's own system, Tunnel Goons. 

28. The Temple of the Blood Moth, Jacob Butcher, 2019. [Discussed on Between Two Cairns.] OSR goodness/weirdness.

29. Mutants of Ixx (trifolds), Karl Stjernberg, 2019? Gamma world style hack using Into the Odd mechanics.

30. Cairn, Yochai Gal, 2021? An original, new school revolution adventure game.

BONUS: Apocalypse World PROTOTYPES - four pocket mods handed to me by Vincent Baker at his house after a night of playing 3:16 in the year of our Lord 2007. The origins of PbtA!

Friday, October 21, 2022

Grenadier 5004 17/L Larva

I may or may not have paid nearly $20 to get this bare metal blob. But honestly this one had the best face detail I'd seen on this model and I decided not to quibble over the extra bucks. 


This mini came in a Grenadier box set, specifically 5004 Tomb of Spells, which contained about 20 figures. 


The Larva (aka "Soul Larva") as a monster appeared in the 1977 AD&D Monster Manual. It may have appeared before that, but I don't see it in TLB vol 1 or in Holmes Basic. It is inspired by Roman demon mythology. In lore, it is the lowly form of a trapped soul, controlled by hags and used by various evil magicians to create imps and such. Mostly it just has a nice "gross!" vibe to it. 

Here are some pics after painting. I wish I had done the faces better, but damn they are small!!!


Appearance on Redcaps

I recently dropped in on the Redcaps Podcast and jabbered on about projects, miniatures and props, rust monsters, big world building, and depression. Enjoy.

The Redcaps Podcast episode 95

Friday, October 14, 2022

Monster Drawing Club 2022, week 2

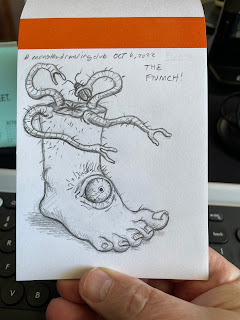
I had zero interest in drawing one of the prompts this week (Dead Baby, really?). Oddly the "nope" doodle I did in reaction to that prompt is one of my favorites. But you can't beat the devil at the end. That should be a tattoo. 


Monday, October 10, 2022

Monster Drawing Club 2022, week 1

 I'm turning these into weekly rather than daily posts. The latter was "too much." I do love these daily drawing exercises though; they are a great way to knock off the rust. 


Tuesday, September 6, 2022

Project Grayskull part 4 - towers and teeth!

TLDR: A continuation of my project: turning Castle Grayskull into a GM screen. Earlier posts: Project Grayskull Part 1Part 2, and Part 3

With the exterior painted it was time to tackle some engineering. Technical building isn't really my strong suit, but I can be as handy as I need to be most of the time. First I tackled the shelves using some pegboard I had around. I cut them out with a sabre saw and decided they were too thin, so I cut out two more in the same shapes and glued them together. It would have been easier, perhaps, to go get some nicer wood of the correct thickness, but I just wanted to keep moving forward. Also it's good to use up stuff and not spend money!

Since the shelves and the dice tower kind of came together at the same time, I'm going to show the piece I used for the top half of the dice tower first. It's obviously some kind of piece for joining misaligned PVC pipes. I figured the corrugated sides and the bends I planned to put into it would work for tumbling the dice, no "baffles" necessary inside. I painted the piece gray so that it looked more in-keeping with the build. The following pictures show it in place, with the two shelves (unpainted and then painted). Note the cut-outs to secure the top and bottom of the dice tower/slide. 


My original idea for the bottom end of the dice tower was for the dice to free-fall into a self-standing elbow piece that would shoot them out of the mouth. I used a black piece of PVC and globbed up the end with hot glue, then painted it a flesh pink just to be fun/gross. Here it is. Don't get too attached though, because it's going away.


Note the view of the inside of the drawbridge in these photos. It's still just green plastic. I'll get to that below. But first, a slo-mo video of me testing out the dice tower. Please turn your sound on so you can hear the clunky tumbling of dice in slow-mo. Also note how the bottom end of the dice tower wobbles. 


Basically, I gave up on self-standing elbow because of my dissatisfaction with its instability. Also the gloopy-throat look was just too much and I didn't care for the "inelegance" of a two-piece solution. Plan B involved something subtler, something that was firmly hung instead of just sitting in place, and (bonus) a separate hidden dice input for the GM!


Here is the plan A and plan B pieces side-by-side. Sharp eyes will catch the LED light tape, remote, and USB power bank in the background. That comes later. The black-pipe solution on the right is the new plan. I hot-glued the top of it to the shelf as pictured below. It works great, by the way, and is very sturdy. I keep forgetting little things I did in the process because all of this work was completed over a year ago. I put some craft foam in the bottom of the castle as a kind of flooring. But then I ended up cutting away some of it and painting the space below the dice tower bottom all black so that it looked better from the outside when open. Looking at this makes me a little nauseous that I didn't go with black on the upper part of the tube and the shelf too. But ... "perfect is the enemy of done."


And here is what the top of the dice tower looks like from the front, with the case closed. In a later stage I add a backing piece behind the tower to hide the interior. The goal here is for players to be able to reach up and throw dice in the tower. The GM can use the top or the secret side input from behind the screen. 


Ok. Now for something fun. The inside of that drawbridge/gate/door thing. I used moldable plastic to create teeth. You just dump the pellets into a mug of boiling water and they become malleable for a few minutes. I bought this stuff, Polly Plastics, through Amazon. The front tooth and near-jaw molars were molded just a few seconds before the picture was taken. The molars along the far side (near the container) are cooling into a cloudy white. When fully cool, the plastic is white and hard, as seen in the following picture.


The plastic is a bit waxy and smooth at first, and it takes a good coat of primer before it will take paint well. Sanding it would probably be smart. Oh! I almost forgot, why even do this? Well, otherwise the dice would roll right off the edge of the gate. Note that in the dice video above I placed a bit of pipe-strap in a U shape around the tongue to get an idea of how high the dice "dam" needed to be. Even now the dice don't always lay flat on the tongue. I'm considering a bit of clear resin poured on the tongue to make it look wet and to also make it flat. Finally, I ended up putting a spot of craft foam inside the bottom bend of the black PVC to slow the dice down just a little. I mean, they really come flying out!


Here it is finished and painted. No comments from anyone who understands teeth please. I clearly don't, but I think it works, visually. I tried to roughly match the upper chompers, which look gorilla like to me. Here's a front and side view.


That was a lot to absorb, so we'll leave it there for now. Next up "finishing steps?"


Friday, September 2, 2022

Project Grayskull part 3 - the paint job!

TLDR: A continuation of my Castle Grayskull turned into a GM screen project. Earlier posts can be read here: Project Grayskull Part 1 - In the RawProject Grayskull Part 2 - Planning and Prepping.

With the shell cleaned up and the eye holes drilled, it seemed like a good time to get the paint done. I started with a coat of primer. Specifically, I used Rust-Oleum 2X Satin Granite spray paint. 


This was my first mistake -- not the paint, the paint is GREAT -- the color and the satin finish. If I had it to do over again I would have based it flat black since most of the painting I did was dry brush, but we'll get to that. Here is Castle GRAYskull. Note the purple die. Gonna talk about that next.


The die shown is a Roll4Initiative d20. They are a little larger than normal d20s. I ended up replacing these with plastic purple gems, but I think I may go back to the d20s. (You'll see the difference in a future post.) Thing is, these were just a little big to sit in the socket easily, so I may go with a different brand. But the idea was to rotate them so that one eye showed the blessed 20 and the other accursed 1! Like this:


You can see the light leaking out around them here. But they are just lying in the sockets; they aren't hot glued in yet. 

The next step was greens. Now I knew I was going to be using a lot of paint and the detail is good but on a much larger scale than a miniature, so I bought cheap craft acrylic paint from Michael's. The greens I used were Bright Mint and Apple Tart, with a bit of Ocean Breeze. In fact, these paints account for about 90% of the work. (I forgot to put the red I used on the roof. See it below - in the shot.) 


I used a dry-brush technique for a lot of it, which is to say I loaded the brush, then dabbed a bunch off on a paper towel, then dragged the brush across the surface (rather than jabbing it into the cracks). I made multiple passes sometimes with one color of green, sometimes with another, and sometimes with the brush loaded with a loose mix of both (swirled or loaded one color to a side but not actually mixed). Here and there are touches of turquoise. This photo shows the base coast. The green is basically done, but the teeth, door, and some other details are simply blocked in with brown or white. I did make one pass here painting a runny black back wash into the cracks (remember I said that I should have based it black?), the gray was too soft and didn't provide enough contrast. The eye sockets were painted black for contrast and the dice have been glued in here, with lights shining behind them. (These weren't the lights I eventually used, just a cheap string of Christmas white LEDs that ran on a battery.) 

Anyway, it's already starting to look pretty cool, but just wait.


Here is the (close to) final result, exterior, after painting the rocks, the metallic bits on the door, and the (what I perceived to be copper) dome. The roof tiles were done in a brick red for contrast with the green. I also blotched some green spots on the copper to make it look like a patina from natural weathering. At this point I was getting hella pleased with myself. This picture was taken about 6 work hours (non-consecutive) into the project. The original matching picture is placed immediately below the painted piece for comparison.


This is honestly the first time I've looked at the pics side by side. I kind of miss that high, acid green on the original, but the overall effect of mine is clearly superior, a bit more "realistic" (if such a word even makes sense here), and kind of ghostly. It's amazing how much more of the detail you can see when it isn't literally camouflaged by random paint sprays. 

The next step involves dealing with the innards. Shelves, dice tower tube, inside of the gate, etc. Stay tuned. 


s

Thursday, September 1, 2022

Project Grayskull part 2 - planning and prep

TLDR: A continuation of my Castle Grayskull / GM screen project. The first part can be read here: Project Grayskull Part 1 - In the Raw

Here's a quick look at my first ideas for the project, from a journal I was keeping at the time. This was probably drawn around November 2020. It's a pretty solid beginning though it's clear I don't know what to do with the left half other than "storage." I was mostly thinking about the dice tower and lighting components.


My initial idea for the dice tower involved a bendy, corrugated hose, like one might find on a shop vac. Turns out those are kind of pricey and I was better off with just common PVC anyway. (I used black PVC so I didn't have to paint it, but more about the dice tower -- and my mistakes -- in a future post.)

I didn't want a plug-dependency, so from the beginning I was thinking of LED lights that could be run off a USB power bank or battery pack. From there, my notions were pretty vague about what else I might want, but some earlier mock ups of cardboard shelves told me that I had room for either full-sized books or digest books and a shelf on the left hand side of the open screen. See pics below. 

I opted for digest-sized books, partly because the weight of multiple full-sized books seemed impractical and because I could pack more into the build if I stuck with zine-sized books. I thought about a removable shelf on the left, but given the really curvy nature of the interior, I was afraid it wouldn't stay put if I didn't glue it in. 


I mocked up these cardboard shelves in multiple stages. I didn't have one of those flexible rulers that will hold a shape, so I just kind of worked with paper and guesses until I got it right. I have sense found some images of the shelves online and think I might have used those to trace, but I would have had to scale them up to the right size before printing. 


At this point I took my first scary, irreversible step and drilled holes for the light-up gem-eyes. I drilled them at 1.75 inches in diameter. I was really afraid that the bit would catch and make a crack in the case but that didn't happen. If it had, I supposed I would have repaired it with green stuff.


Next up - painting and lights (attempt #1)!


Monday, August 29, 2022

Project Grayskull part 1 - in the raw

When I first went to Gary Con in 2018, I saw Reid San Filippo's fabulous GM screen fashioned from a Castle Grayskull playset. Once that idea gets in your head, there's no getting it out, so I did what all "geniuses" do – I stole it. (The idea, not his GM screen.)

Though I didn't know it at the time, Reid's project was still in the beginning stages; he has since added a lot to it. He also did a far better job of documenting his process than I have. But I'll try to make up for it with a detailed narrative for others who want to follow in his/our footsteps.

In case you don't know anything about it, Castle Grayskull was a central icon of the He-Man toy line and cartoon (c. 1982-83). The castle is a major source of power but neither He-Man nor his archenemy Skeletor live there. Which confuses me a little ... and here is where I admit I've never watched more than 10 minutes of the cartoon. 

I don't know if I would have ever acted on the idea until a friend of mine actually bought the castle and shipped it to me. (The shipping, as I understand it, was 2-3 times more costly than the castle!) 

Here it is in its virgin state. Well. Maybe not virgin, but rather lovingly used. All the shelves, stickers, figures, accessories, etc. were missing. In these photos I have scraped off a half-sticker that was left inside and washed the whole thing down to remove any major surface dirt. The sticker was surprisingly hard to remove, despite using Goo-Gone and a razor blade. I wasn't fully successful.

I want to take this slow, so even though I have already nearly finished this project I'm going to write about it on a once-a-week basis for a while. I hope you enjoy watching it be transformed.


The iconic front: case closed


The exterior: case open/drawbridge up


The interior: case open/drawbridge up. Note the brackets for shelves at the midline (both sides) and at tower level (on right).


The top: case closed. Note the awkward "holes" - you can also see them from the case closed front (above) and back (below) views.


The back: case closed. It cracks me up how the black paint was just "striped" on with no regard to the actual contour of the sculpt. I love the two shades of green though (lime and mint?). I kept/replicated those for my paint job (next post). I like to think of them as the ghosty-greens.


Wednesday, August 17, 2022

HD is better than hp

TLDR: instead of tracking hp, make a box or circle for each HD a creature has and tick them off as the hits come in, rounding up or down to "5" per box.

Let's start with this - hit points (hp) is just a more granular way of representing hit dice (HD). In most old school games, creature HD come in d8s. An average roll on a d8 is 4.5. So 1 HD = 4.5 hp. 

Weapon damage varies from d4 to d10, usually. The ranges, averages look like this:

  • d4: 1-4, 2.5
  • d6: 1-6, 3.5
  • d8: 1-8, 4.5
  • d10: 1-10, 5.5
But just as aside, let's remember that initially all weapons did d6 damage, rather than variable dice damage, in D&D (1974, 3LB). In which case the average hit was around 4 hp, which is also the average point of the above range of averages. 

One might even say that the average hit (1:4) and the average HD (1:4.5) are about the same. That's not coincidence. Hit points are just Gygax's fancy way of amping up the meaning of hits and hit dice – of making them more granular. (Or is that less granular? I never get that right. What I mean to say is: more finely grained.)

Running encounters with hp is the norm that most of us have used countless times. If a creature has 7 HD (32 hp), we start with 32 and whittle it away as the hits come in. Let's say the damage done to a creature by a party over the course of a few rounds goes like this: 2, 9, 4, 6, 7, 1, 10! That's a total of 39, with the final shot getting in 7 points of "overkill" damage. That's all fine and good. Basic addition/subtraction math is pretty easy. 

But why all this granularity? Is it for some notion of "realism" or to make things less predictable? Does it actually make the game more fun? Consider the following way of tracking things as the GM.

Same monster, same fight. The monster's HD are marked as bubbles like:

Monster: HD 7 OOOOOOO

As the damage comes in the bubbles get marked off as follows:

  • 2 damage: no bubble is marked, but maybe a dot or tick mark is used to show a weak hit. 
  • 9: two bubbles gone! (10 tracked damage in bubble form /11 actual damage by weapons.)
  • 4: another bubble (totals now 15 tracked / 15 actual)
  • 6: one more (20/21)
  • 7: one more (25/28)
  • 1: none? one? This is the GM's call if their gut says they are running behind actual damage. Let's say none for argument's sake. (25/29)
  • 10!: two (35/39) - the monster is defeated!
Basically, this combat would have gone the same number of turns whether we were tracking HD bubbles or actual hp. Having used HD bubbles rather than hp a number of times, I believe this example rings rings true – the difference is negligible. Maybe sometimes it takes one more or one less hit than it would have if we were doing the math. 

What is the upside? I find it a lot more satisfying to tick off a bubble than to subtract one number from another and write down a new number. The tracking of wounds takes up a little less headspace than tracking hp does, and even the note-taking is slightly faster. Anything that makes me more fluid at the table is a big deal. An odd, but useful side effect is that I know exactly how much page space tracking wounds is going to take in my notes. With math I have to save margins or some other white space for recording hp and hits.

Here's a two-fight scenario I ran last Sunday from my journal. I could find you a prettier example, but I'm going to be "real" here and show you the most recent one. There's a lot going on here. Bubbles for spell-like abilities as well as HD, lots of chicken-scratches and shorthand concepts that only make sense to me, etc. But the point is I replaced at least 7 pages of an actual printed material with this two-page journal spread, and it made running the session far easier for me. 


The other argument I might add for using HD bubbles is that they give me a little room to pace the fight better without fudging, but that argument gets a little nuanced and may not hold up. I say it isn't like dice fudging, but it is a bit like squinting to get the overall effect rather than trying to see detail. 

Any way, this is my current method. Your mileage may vary, but I can't see the downside of tracking HD bubbles instead of hp numbers. 

I suppose this also begs the question, do I do the reverse? Ask players to track their HP as Levels/Wounds and deliver hits from creatures in increments (i.e. a hit of 14 damage means I say "mark off three wounds")? No, I don't do that. Players have a lot less to track and their hp means infinitely more to them than monster hp does to me. The same goes for their weapon damage. I let them roll damage and take damage in hp. In my notes the damage they deal gets converted on the fly to a relative amount of HD bubbles.